ASP.NET Core Web API and Swagger

Hi everyone,

First of all this is my first English article so i am so excited. I hope it will explain you what i want. With my English 🙂

We can develop various projects with ASP.NET Core. The most important of these project types is API Projects i think. What is API? What does the ASP.NET Core Web API provide us? and how the API will relate to product named Swagger? We will try to examine them in this article.

What is this API they call?

API, with its long name Application Programming Interface, can basically be thought of as software that enables different types of applications to work together. The API enables data exchange between applications. Of course, during these data transfers all of the processes used in security, authorization, and general application logic are used. The most obvious difference is that API applications do not have an interface (GUI).

The results of this operations (database crud, getting data from other applications etc.) with the values received via the API (sometimes without any value) can be given in a readable form by other applications. Thus, all applications running on different platforms and with different technologies can send data to the same API and receive the results and evaluate them on their own structure.

Today, the most known use of API technologies is the backend of mobile applications. Whether the mobile application is on the IOS or Android platform, it can read and process data via same API.

What is going on with ASP.NET Core Web API then?

API is actually a technology, a concept that is mentioned as a structure. Of course, an API application can be written in different languages. In this article, we will examine how to create an API application with ASP.NET Core.

Let’s create our ASP.NET Core Web API project, then what is Swagger? How to use? Then continue our review.

We will use Visual Studio Code to work with our project. We are creating a new ASP.NET Core project. We will use .NET Core CLI for our project. First, we create our Web API project as follows.

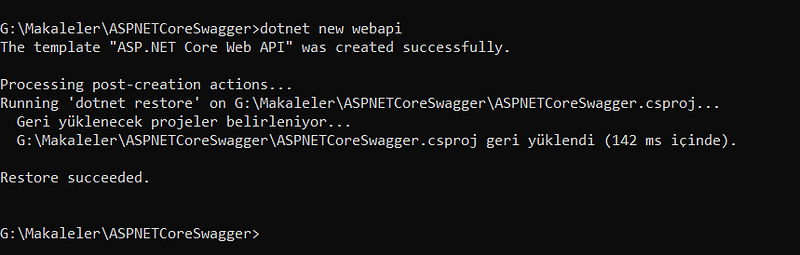
Then run the dotnet run command to test our application and check our created API.

We can see the address of our application after the command is run. http://localhost:5000 We can control our application with our browser at this address. A Controller will come ready so that we can test it in the newly created skeleton application or as an example for beginners. (WeatherForecast) we can test our API through this controller.

Another test method is the POSTMAN application, which API developers often use. You can download the POSTMAN application here. POSTMAN is an application for working with APIs. POSTMAN is used to avoid the hassle of receiving API data or sending requests through browsers. The controller, which is available via the API via POSTMAN, brings us the data as follows.

If you wish, we can now proceed to write a code. Now we will create a controller ourselves and let the data (statically) come from there. Then we will be able to test this controller we created on the API and see how we work with Swagger.

We will use Visual Studio Code to create a new controller. To open our project with Visual Studio Code, we will use code . on the command line again.

When our project is first opened with Visual Studio Code, it will ask us if we want the requirements to be installed in order to build and debug our application project. In this section, we can complete the installation of the requirements with the Yes button.

The Controller we will create will serve basic vehicle information via API. For this, we must first create our vehicle model. We create a file called Car.cs by opening a new folder named Models via the file explorer on the left. Then we write our model to this file.

Then we create a new file under the Controllers folder and name it CarController.cs. Here we will perform operations related to a list of vehicles and serve these operations through the API.

Our CarController.cs file will be as follows.

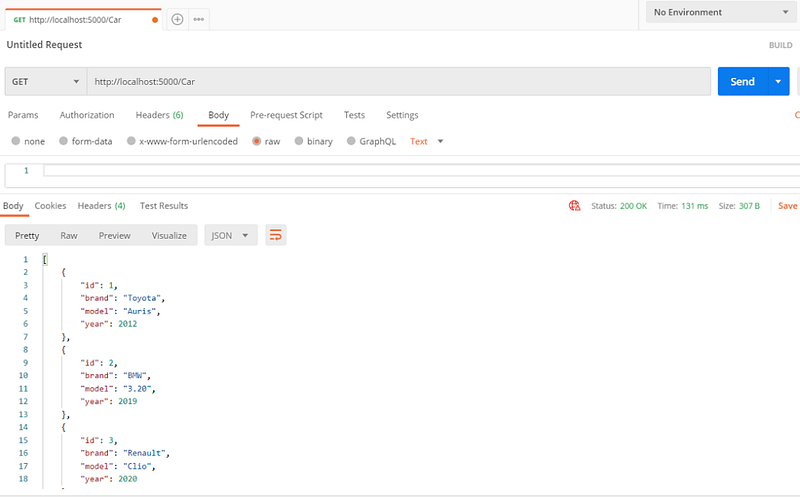
Now you can test our API using the Controller you created.

Let’s run our application by typing dotnet run on the terminal that we will open via Visual Studio Code. We can access both the list and the vehicle information we want via POSTMAN.

So far, we have worked on the creation of our API. So how do we convey information about the API and its operation to the developers of the applications that will use this API? Let’s say we are developing backend services within a team that develops mobile applications. We need to inform team members who develop mobile applications about how these methods we developed work. It will be the healthiest method to both call the methods and document and transmit the returned response information.

In such a case, it would of course be tiring to write each method one by one in a certain format. Swagger is an ideal product to make this situation easier and more practical.

Swagger automatically documents the method information we created in our project that we added. This method information can be viewed by application developers who want to use our API with each request and response information.

Swagger consists of two parts. The first and most important of these is the Swagger Specification. Here is a swagger.json file that is automatically created by Swagger and every API update, this file is updated and contains the information of our methods in the API.

The second part is called Swagger UI. Here, we can get visual information of the methods on the API. The work of the methods, the answers they give and the parameter information they receive can be viewed. We can also simply run methods and get method responses from the UI. By specifically writing an application via Swagger UI, there will be no need to test methods via API.

Now let’s look at how we can adapt Swagger to our application that we have created.

Swagger consists of three components. It is possible to import all these components into our application as a single nuget package.

  • Swashbuckle.AspNetCore.Swagger
  • Swashbuckle.AspNetCore.SwaggerGen
  • Swashbuckle.AspNetCore.SwaggerUI

Let’s install the Swagger package

To add the package to our project, it will be sufficient to type the following command from the Visual Studio Code terminal screen.

dotnet add package Swashbuckle.AspNetCore

Then the package will be downloaded and installed in our application.

In order to adapt Swagger to our application, we first need to add the following lines to the ConfigureServices method in Startup.cs.

Again, we add the following lines to the Configure method in Startup.cs.

Now we can run our application from the Visual Studio Code terminal and test the Swagger implementation. For this, we need to type dotnet run on the terminal screen.

Then, if we go to https://localhost:5001/swagger/v1/swagger.json from our browser or via POSTMAN, we can see that our Controller-based method information comes in json format.

Well, we talked about a UI component. Now let’s see how to use this UI component.

When our project is running, when we access https://localhost:5001/swagger/index.html via our browser, a page titled API Information will be opened and we will be able to view our method information.

We can get the information of the methods via Swagger UI by clicking on the method names.

Here we see the features of our method, where we list the vehicle information. The Parameters section gives information about the parameter information of our method, and the Responses section provides information about the response returned via the API method. With the Try it out button on the top right, we can run the API method and see the returned information.

It is also possible to view the descriptions of our methods on the Swagger UI. In this way, it is possible to explain the function of the method with meaningful explanations to application developers who examine our methods.

For this, we need to add the following lines to the csproj file of our application (the file name for our application is ASPNETCoreSwagger.csproj).

Then we add the following lines to the ConfigureServices method in the Startup.cs file.

Now we can add annotations to our API methods and have these annotations displayed through the Swagger UI. Below is an example of how we can annotate our methods. Then you can view the method description via Swagger UI.

When we run our project again and check it over Swagger UI, we can see that the method description comes.

As you can see, Swagger API solves the documentation processes for us quickly in our projects. Software developers who will benefit from the API will be more comfortable with Swagger to reach the right information.

See you again with another article.

https://www.yazilimbilisim.net/c-sharp/asp-net/api-nedir/
https://code-maze.com/swagger-ui-asp-net-core-web-api/

ASP.NET Core Web API ve Swagger

Merhaba,

ASP.NET Core ile birlikte çeşitli projeler geliştirebiliyoruz. Bu proje tiplerinden en önemlisi ise API projeler. API nedir? ASP.NET Core Web API bize neler sağlar? ve Swagger isimli ürün ile API’nin nasıl bir ilgisi olacak bu makalede bunları incelemeye çalışacağız.

Nedir bu API dedikleri?

API uzun adıyla Application Programming Interface, temel olarak farklı türden uygulamaların beraber çalışmalarını sağlayan yazılımlar olarak düşünülebilir. API uygulamalar arasında veri alışverişlerini sağlar. Tabii bu veri transferleri sırasında güvenlik, yetkilendirme ve yine genel uygulama mantığında kullanılan işlemlerin hepsi kullanılmaktadır. En belirgin fark ise API uygulamalarının bir arayüzlerinin (GUI) olmamasıdır.

API üzerinden alınan değerler ile -bazen de değer almadan- yapılan işlemlerin sonuçları (database crud, başka uygulamalardan veri almak vb.) başka uygulamalar tarafından okunabilir şekilde verilebilmektedir. Böylelikle farklı platformlarda çalışan, farklı teknolojilere sahip uygulamaların tamamı aynı API’ye veri gönderebilir ve sonuçları alarak kendi yapıları üzerinde değerlendirebilirler.

API teknolojilerinin günümüzde en bilinen kullanım yeri mobil uygulamaların arka tarafında bulunan servisler (backend) olarak karşımıza çıkar. Mobil uygulama ister IOS ister Android platformunda olsun aynı API üzerinden verileri okur ve işlemlerini yapabilir.

ASP.NET Core Web API ne oluyor o zaman ?

API aslında bir teknoloji, bir yapı olarak bahsedilen bir kavram. Tabii ki bir API uygulaması farklı diller ile yazılabilmektedir. Biz bu makalemizde ASP.NET Core ile bir API uygulamasının nasıl oluşturulacağının inceleyeceğiz.

ASP.NET Core ile ilgili daha içerikli bilgi için Nedir bu ASP.NET Core ?makalesini inceleyebilirsiniz.

ASP.NET Core Web API projemizi oluşturalım ardından Swagger nedir ? Nasıl kullanılır? İncelememize devam edelim.

Projemiz ile çalışmak için Visual Studio Code kullanacağız. Yeni bir ASP.NET Core projesi oluşturuyoruz. Projemiz için .NET Core CLI’den yaralanacağız. İlk önce webapi projemizi aşağıdaki gibi oluşturuyoruz.

Ardından uygulamamızı test etmek için dotnet run komutunu çalıştıralım ve oluşturulmuş olan API’mizi kontrol edelim.

Uygulamızın adresini komut çalıştırıldıktan sonra görebilmekteyiz. http://localhost:5000 bu adres üzerinden tarayıcımız ile uygulamamızı kontrol edebiliriz. Yeni oluşturulan iskelet uygulama içerisinde test edebilmemiz veya yeni başlayanlar için örnek olması açısında bir Controller hazır bir şekilde gelecektir. (WeatherForecast) bu controller üzerinden API’mizi test edebiliriz.

Bir başka test yöntemi ise API geliştiricilerini sıklıkla kullandığı POSTMAN uygulamasıdır. POSTMAN uygulamasını buradan indirebilirsiniz. POSTMAN, API’ler ile çalışmak için kullanılan bir uygulamadır. Tarayıcılar üzerinden API verilerini almanın veya isteklerin gönderilmesinin zorluğunu yaşamamak için POSTMAN kullanılmaktadır. POSTMAN üzerinden de API üzerinden bulunan controller aşağıdaki şekilde bize verileri getirmektedir.

Dilerseniz şimdi bir kod yazmaya geçebiliriz. Şimdi kendimiz bir controller oluşturarak buradan verilerin (statik olarak) gelmesini sağlayacağız. Ardından API üzerinde oluşturduğumuz bu controller’ı test edip Swagger ile çalışmamıza bakabileceğiz.

Yeni controller oluşturmak için Visual Studio Code kullanacağız projemizi Visual Studio Code ile açmak için yine komut satırı üzerinde code . yazmamız yeterli olacaktır.

Projemiz Visual Studio Code ile ilk açıldığı zaman uygulama projemizi build ve debug edebilmek için gerekliliklerin yüklenmesini isteyip / istemediğimizi bize soracaktır. Bu kısımda Yes butonu ile gerekliliklerin yüklemesini tamamlayabiliriz.

Yeni oluşturacağımız Controller temel araç bilgilerini API üzerinden servis edecektir. Bunun için ilk önce araç modelimizi oluşturmalıyız. Sol dosya gezgini üzerinden Models isminde yeni bir klasör açarak Car.cs isminde bir dosya oluşturuyoruz. Ardından bu dosyaya modelimizi yazıyoruz.

namespace ASPNETCoreSwagger.Models
{
    public class Car
    {
        public int Id { get; set; }
        public string Brand { get; set; }
        public string Model { get; set; }
        public int Year { get; set; }
    }
}

Ardından Controllers klasörü altında yeni bir dosya oluşturarak adına CarController.cs veriyoruz. Burada bir araç listesi ile ilgili işlemler yapacağız ve bu işlemleri API üzerinden servis edeceğiz.

CarController.cs dosyamız ise aşağıdaki gibi olacaktır.

using System.Collections.Generic;
using Microsoft.AspNetCore.Mvc;
using ASPNETCoreSwagger.Models;
namespace ASPNETCoreSwagger.Controllers
{
    [ApiController]
    [Route("[controller]")]
    public class CarController : ControllerBase
    {
        [HttpGet]
        public IEnumerable<Car> Get()
        {
            return GetCars();
        }
        [HttpGet("{id}", Name = "Get")]
        public Car Get(int id)
        {
            return GetCars().Find(e => e.Id == id);
        }
        [HttpPost]
        [Produces("application/json")]
        public Car Post([FromBody] Car car)
        {
            return new Car() { Id = car.Id, Brand = car.Brand, Model = car.Model, Year = car.Year };
        }
        [HttpPut("{id}")]
        public void Put(int id, [FromBody] Car car)
        {
            
        }
        
        [HttpDelete("{id}")]
        public void Delete(int id)
        {
        }
        private List<Car> GetCars()
        {
            return new List<Car>()
            {
                new Car() { Id = 1, Brand = "Toyota", Model = "Auris", Year = 2012 },
                new Car() { Id = 2, Brand = "BMW", Model = "3.20", Year = 2019 },
                new Car() { Id = 3, Brand = "Renault", Model = "Clio", Year = 2020 }
            };
        }
    }
}

Şimdi oluşturduğunuz Controller’ı kullanarak API’mizi test edebiliriz.

Visual Studio Code üzerinden açacağımız terminal üzerinde dotnet run yazarak uygulamamızı çalıştıralım. POSTMAN üzerinden hem liste hem de istediğimiz araç bilgisine ulaşabilmekteyiz.

Buraya kadar API’mizin oluşturulması ile ilgili çalışmalar yaptık. Peki bu API’yi kullanacak olan uygulamaların geliştiricilerine API ve çalışması ile ilgili bilgiyi nasıl ileteceğiz ? Diyelim ki mobil uygulama geliştiren bir takımın içerisinde backend servislerini geliştiriyoruz. Mobil uygulamaları geliştiren ekip üyelerine bu geliştirdiğimiz metodların nasıl çalıştığı hakkında bilgi vermemiz gerekir. Hem metodların çağırılmaları hem de geri dönen cevap bilgilerinin doküman haline getirilip iletilmesi en sağlıklı yöntem olacaktır.

Böyle bir durumda her metodu tek tek belirli bir formatta yazmak elbette yorucu olacaktır. Bu durumu daha kolay ve pratik hale getirmek için Swagger ideal bir ürün olarak karşımıza çıkıyor.

Swagger eklediğimiz projemizde oluşturduğumuz metod bilgilerini otomatik olarak dokümante eder. Bu metod bilgileri her istekleri (request) hem de cevap (response) bilgileri ile birlikte API’mizi kullanmak isteyen uygulama geliştiriciler tarafından görüntülenebilir.

Swagger iki bölümden oluşmaktadır. Bunlardan ilki ve en önemlisi Swagger Specification‘dır. Burada Swagger tarafından otomatik olarak oluşturulan bir swagger.json dosyası mevcuttur ve her API güncellemesinde bu dosya güncellenerek API içerisinde bulunan metodlarımızın bilgilerini barındırır.

İkinci bölüm ise Swagger UI olarak adlandırılmaktadır. Burada da API üzerinde bulunan metodların görsel olarak bilgilerini alabiliriz. Metodların çalışmalarını, verdikleri cevapları ve aldıkları parametre bilgileri görüntülenebilir. Ayrıca basit bir şekilde metodları çalıştırabilir ve metod cevaplarının UI üzerinden alabiliriz. Swagger UI üzerinden özellikle bir uygulama yazarak API üzerinden metodların test edilmesine gerek kalmayacaktır.

Şimdi oluşturduğumuz uygulamamıza Swagger’ı nasıl uyarlarız ona bakalım.

Swagger üç bileşenden oluşmaktadır. Tüm bu bileşenleri tek nuget paketi şeklinde uygulamamıza almamız mümkündür.

Bu bileşenler;

  • Swashbuckle.AspNetCore.Swagger
  • Swashbuckle.AspNetCore.SwaggerGen
  • Swashbuckle.AspNetCore.SwaggerUI

Swagger paketini yükleyelim

Paketi projemize eklemek için Visual Studio Code terminal ekranından aşağıdaki komutu yazmamız yeterli olacaktır.

dotnet add package Swashbuckle.AspNetCore

Ardından paket uygulamamıza indirilmiş ve yüklenmiş olacaktır.

Swagger’ın uygulamamıza uyarlanması için ilk önce Startup.cs içerisinde bulunan ConfigureServices metoduna aşağıdaki satırları eklememiz gerekmektedir.

Yine Startup.cs içerisinde bulunan Configure metoduna da aşağıdaki satırları ekliyoruz.

Şimdi Visual Studio Code terminal ekranından uygulamamızı çalıştırıp Swagger uyarlamasının test edebiliriz. Bunun için terminal ekranına dotnet run yazmamız gerekmektedir.

Ardından tarayıcımızdan veya POSTMAN üzerinden https://localhost:5001/swagger/v1/swagger.json adresine girersek Controller bazlı metod bilgilerimizin json formatında geldiğini görebiliriz.

Peki bir UI bileşeninden bahsetmiştik. Şimdi de bu UI bileşenini nasıl kullanacağımıza bakalım.

Projemiz çalışırken https://localhost:5001/swagger/index.html adresine tarayıcımız üzerinden girdiğimiz zaman API Bilgileri başlıklı bir sayfa açılacak ve metot bilgilerimizi görüntüleyebileceğiz.

Swagger UI üzerinden metodların bilgilerini metot isimlerine tıklayarak alabiliriz.

Burada araç bilgilerini listelediğimiz metodumuzun özelliklerini görüyoruz. Parameters bölümü metodumuzun parametre bilgilerini, Responses bölümü ise API metodu üzerinden dönen cevap (response) hakkında bilgi vermektedir. Sağ üst kısımda bulunan Try it out butonu ile API metodunu çalıştırabilir dönen bilgileri de görebiliriz.

Swagger UI üzerinde metodlarımızın açıklamalarını da görüntülememiz mümkündür. Bu şekilde metodlarımızı inceleyen uygulama geliştiricilere anlamlı açıklamalar ile metodun görevini anlatmamız mümkün olmaktadır.

Bunun için uygulamamızın csproj dosyasına (bizim uygulamamız için dosya adı ASPNETCoreSwagger.csproj) aşağıda bulunan satırları eklememiz gerekmektedir.

Ardından Startup.cs dosyasında bulunan ConfigureServices metoduna da aşağıdaki satırları ekliyoruz.

Artık API metodlarımıza açıklamalar ekleyebilir ve bu açıklamaların Swagger UI üzerinden görüntülenmesini sağlayabiliriz. Metodlarımıza nasıl açıklama ekleyeceğimizin örneğini aşağıda bulabilirsiniz. Ardından Swagger UI üzerinden metot açıklamasını görüntüleyebilirsiniz.

Projemizi yeniden çalıştırıp Swagger UI üzerinden kontrol ettiğimiz zaman metod açıklamasının geldiğini görebiliriz.

Görüldüğü gibi Swagger API projelerimizde dokümantasyon işlemlerini bizler için hızlı bir şekilde çözmektedir. API’den yararlanacak olan yazılım geliştiricilerin doğru bilgilere ulaşması Swagger ile daha rahat olacaktır.

Başka bir makale ile yeniden görüşmek üzere.

Kaynaklar:
https://www.yazilimbilisim.net/c-sharp/asp-net/api-nedir/
https://code-maze.com/swagger-ui-asp-net-core-web-api/