
Hello, in this article, we will examine the concept of rate limiting introduced with .NET Core 7.
Every application we develop and deploy consumes shared resources from the hosting machine. Applications that share CPU, memory, and I/O loads also perform database operations. In such cases, it is important to control both the resource consumption of applications and the number of operations they perform.
Intentionally or due to an error, applications can consume excessive resources. For example, a mobile application you’ve created can send more requests to your API application than intended. This will result in excessive resource consumption and performance issues. The applications we create can process a certain number of requests based on the capacity of the servers they run on. If the number of requests exceeds this limit, it can cause the database and application to slow down, and even result in errors.
You can also use the rate limit feature to protect your applications from deliberate attacks aimed at decreasing their performance. As you may know, malicious users can make continuous requests to your application, rendering it unusable. Such attacks are referred to as Denial of Service (DoS) attacks.
In a web application, rate limiting generally refers to restricting the number of requests processed by the web application. This is where the concept of rate limiting comes into play. With rate limiting, you can set limits on the number of requests within a specific time interval for your application or for a specific user. For example, you can set limits such as “5000 requests within 5 minutes” or “10 requests per user within 5 minutes.” Requests can also be limited based on a token or IP address when needed.
Rate Limiting Types
- Concurrency limit: This type of rate limiting controls the number of requests that can concurrently access a resource. When the number of requests reaches the specified limit, further requests will be cut off and receive an error. Once the first request is completed, the limit is incremented by 1, and the pending requests within the limit will start processing.
- Fixed window limit: This type allows a specific number of requests to be made within a defined time interval. Let’s explain it with a commonly encountered example (I’ll use the analogy of a theater): The number of people allowed to watch a play in a theater is predetermined based on the number of seats. Similarly, the duration of the theater performance is known. The audience members who are admitted to a 50-seat theater will watch the play for 1 hour. Meanwhile, new audience members queue up outside for the next session. After the play ends, the next batch of 50 people enters the theater, and the cycle continues. Fixed window limits are implemented in a similar manner.
- Sliding window limit: This type of limit algorithm collects data within a specific window size (often time-based) in a data stream and slides this window over a certain period (usually in seconds or minutes). You can use a sliding window limit to monitor the traffic of an API application and count all requests made within a specific timeframe (e.g., the last 5 minutes).
For example, if an API user is allowed to make a maximum of 100 requests per minute, the sliding window limit is set to 1 minute. At the beginning of each minute, the number of requests made by the API user within the past 1 minute is calculated. If this number exceeds 100, the API user receives an error code, and additional requests are rejected.
Let’s illustrate this algorithm with a diagram:
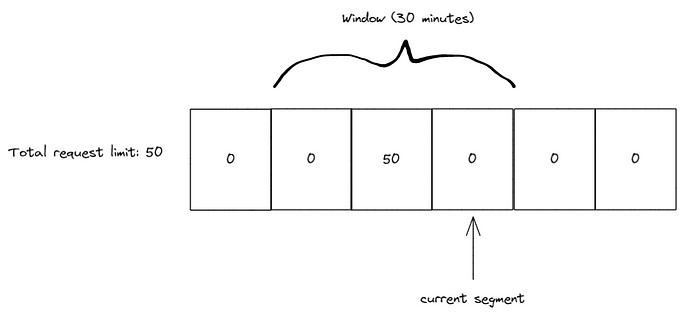
Consider a 2-hour period divided into 4 segments of 30 minutes each. We treat each 30-minute segment as a separate window. We further divide these 30-minute windows into 10-minute control areas, with a total limit of 100.
The first 20 minutes have passed without any requests, and we are currently in the third 10-minute interval.

Within the current 10-minute period, we receive 50 requests. The window is shifted forward by 10 minutes. Since we are still within the first 30 minutes, the count is transferred to the second 30 minutes, and as a result, there are still 50 active request allowances.
The window is shifted to the next 10-minute period, and we receive 20 more requests. Since we are still within the first 30-minute segment, the total number of requests becomes 70, and the remaining limit is updated to 30.
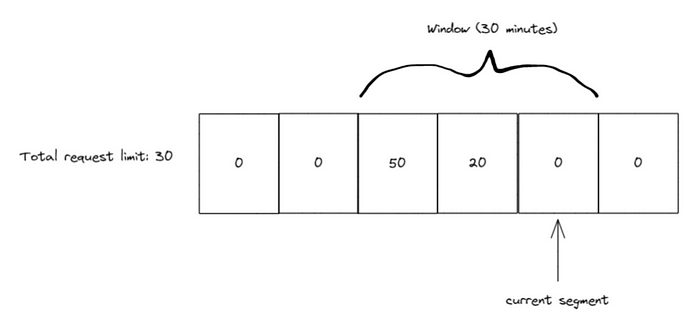
Then the window is shifted to the side, and we are now fully within the second 30-minute segment. We have 20 recorded requests, and the second 30-minute segment starts with 20 requests. Our overall limit remains at 80.
The algorithm continues to operate in this manner.
- Token Bucket Limit: This can be abbreviated as the ability to perform operations as long as there are tokens in a bucket. When an external request comes in, it takes one token from the bucket, and the operation is performed. At certain time intervals, new tokens are added to the bucket in a way that does not overflow it (the bucket has a limit). If the bucket is empty, incoming requests are rejected.
Now let’s examine the topic of rate limiting through code with an example project.
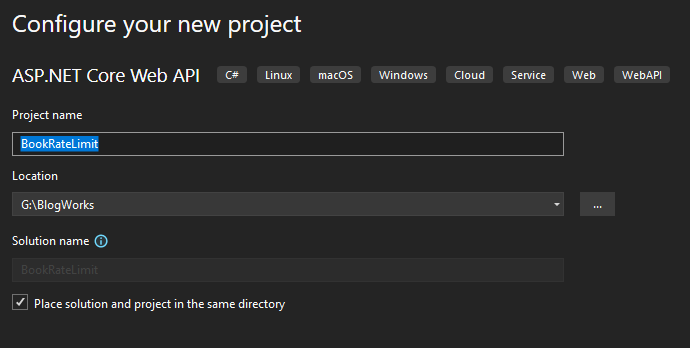
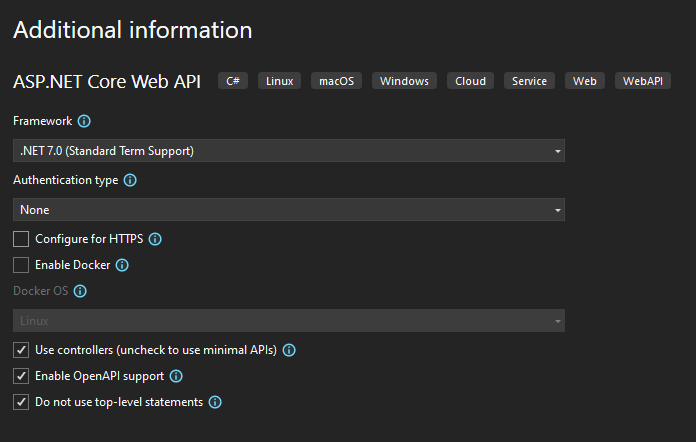
First, let’s create our project. We create a Web API project named “BookRateLimit.”

We can define rate limiting operations within our Program.cs class. For this, it is sufficient to register the middleware using the builder.Services.AddRateLimiter(…) method. We will make our definitions such that a maximum of 5 requests can be accepted within 1 minute.
//Program.cs Sınıfımız
using System.Threading.RateLimiting;

namespace BookRateLimit
{
public class Program
    {
public static void Main(string[] args)
        {
var builder = WebApplication.CreateBuilder(args);

//Rate Limit Tanımları
            builder.Services.AddRateLimiter(options =>
            {
                options.GlobalLimiter = PartitionedRateLimiter.Create<HttpContext, string>(httpcontext =>
                RateLimitPartition.GetFixedWindowLimiter(
                    partitionKey: httpcontext.Request.Headers.Host.ToString(),
                    factory: partition => new FixedWindowRateLimiterOptions
                    {
                        AutoReplenishment = true,
                        PermitLimit = 3,
                        Window = TimeSpan.FromMinutes(1)
                    }
                ));
            });


// Add services to the container.

            builder.Services.AddControllers();
            builder.Services.AddEndpointsApiExplorer();
            builder.Services.AddSwaggerGen();

var app = builder.Build();

// Configure the HTTP request pipeline.
if (app.Environment.IsDevelopment())
            {
                app.UseSwagger();
                app.UseSwaggerUI();
            }

            app.UseAuthorization();

//Tanımladığımız özellikler ile rate limit middleware aktif edilir.
            app.UseRateLimiter();

            app.MapControllers();

            app.Run();
        }
    }
}
Let’s examine the definitions we made before the test.
By creating a GlobalLimiter, we ensure that rate limit definitions are active for all requests to the API.
Using PartitionedRateLimiter, we can diversify the limit definitions based on our desired controls. For example, we can set different limit definitions for different types of requests.
In our example, for simplicity, we applied the FixedWindowLimiter rule.
We specify the maximum number of requests within the window using PermitLimit and the time interval using Window.
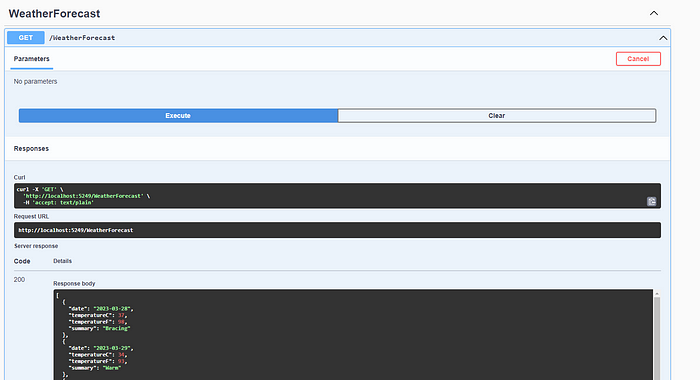
Now we can perform our test. When we run our application, Swagger will automatically be enabled, allowing us to execute our method.

With the first execution, we can receive our responses. However, if more than 5 requests are made within 1 minute, the API will interrupt the requests and return an error message.
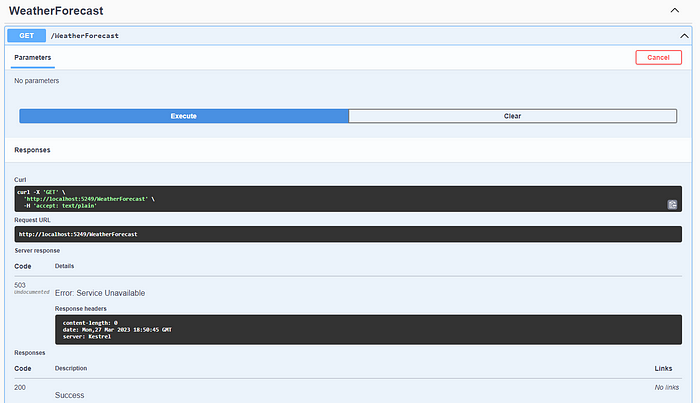
With the activation of the rate limit feature, requests that violate the rules and exceed the limit will end with a 503 error. But what if we want to alert users with a specific error code?
In that case, we can make changes to our Program.cs class to determine how to behave in the OnRejected state.
Let’s update our Program.cs class as follows:
//Program.cs Sınıfımız
using System.Threading.RateLimiting;

namespace BookRateLimit
{
public class Program
    {
public static void Main(string[] args)
        {
var builder = WebApplication.CreateBuilder(args);

//Rate Limit Tanımları
            builder.Services.AddRateLimiter(options =>
            {
                options.GlobalLimiter = PartitionedRateLimiter.Create<HttpContext, string>(httpcontext =>
                RateLimitPartition.GetFixedWindowLimiter(
                    partitionKey: httpcontext.Request.Headers.Host.ToString(),
                    factory: partition => new FixedWindowRateLimiterOptions
                    {
                        AutoReplenishment = true,
                        PermitLimit = 3,
                        Window = TimeSpan.FromMinutes(1)
                    }
                ));

//İsteklerin engellenmesi durumunda verilence hata kodu ve mesaj bilgisi.
                options.OnRejected = async (context, token) =>
                {
                    context.HttpContext.Response.StatusCode = 429;

if (context.Lease.TryGetMetadata(MetadataName.RetryAfter, out var retryAfter))
                    {
await context.HttpContext.Response.WriteAsync(
$"İstek sınır sayısına ulaştınız. {retryAfter.TotalMinutes} dakika sonra tekrar deneyiniz. ", cancellationToken: token);
                    }
else
                    {
await context.HttpContext.Response.WriteAsync(
"İstek sınırına ulaştınız. Daha sonra tekrar deneyin. ", cancellationToken: token);
                    }
                };
            });


// Add services to the container.

            builder.Services.AddControllers();
// Learn more about configuring Swagger/OpenAPI at https://aka.ms/aspnetcore/swashbuckle
            builder.Services.AddEndpointsApiExplorer();
            builder.Services.AddSwaggerGen();

var app = builder.Build();

// Configure the HTTP request pipeline.
if (app.Environment.IsDevelopment())
            {
                app.UseSwagger();
                app.UseSwaggerUI();
            }

            app.UseAuthorization();

//Tanımladığımız özellikler ile rate limit middleware aktif edilir.
            app.UseRateLimiter();

            app.MapControllers();

            app.Run();
        }
    }
}
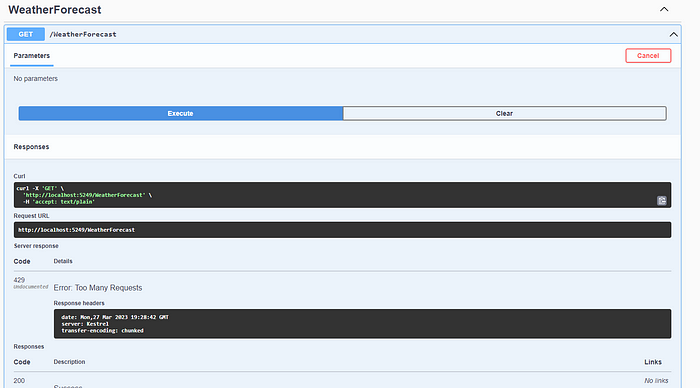
If we test our application again, you will see that this time we receive the error code 429 — Too Many Requests.
If we don’t want to interrupt users’ requests in situations where they exceed the limit, we can make them wait until the specified time period elapses. This way, we prevent requests from being lost. However, in cases where the incoming request volume is high, it can lead to a large request queue for our application. It is important to be cautious in this regard.
For these changes, let’s modify our Program.cs class as follows:
//Program.cs Sınıfımız
using System.Threading.RateLimiting;

namespace BookRateLimit
{
public class Program
    {
public static void Main(string[] args)
        {
var builder = WebApplication.CreateBuilder(args);

//Rate Limit Tanımları
            builder.Services.AddRateLimiter(options =>
            {
                options.GlobalLimiter = PartitionedRateLimiter.Create<HttpContext, string>(httpcontext =>
                RateLimitPartition.GetFixedWindowLimiter(
                    partitionKey: httpcontext.Request.Headers.Host.ToString(),
                    factory: partition => new FixedWindowRateLimiterOptions
                    {
                        AutoReplenishment = true,
                        PermitLimit = 3,
                        Window = TimeSpan.FromMinutes(1),
//Kuyruk bilgileri
                        QueueLimit = 2,
                        QueueProcessingOrder = QueueProcessingOrder.OldestFirst
                    }
                ));

                options.OnRejected = async (context, token) =>
                {
                    context.HttpContext.Response.StatusCode = 429;

if (context.Lease.TryGetMetadata(MetadataName.RetryAfter, out var retryAfter))
                    {
await context.HttpContext.Response.WriteAsync(
$"İstek sınır sayısına ulaştınız. {retryAfter.TotalMinutes} dakika sonra tekrar deneyiniz. ", cancellationToken: token);
                    }
else
                    {
await context.HttpContext.Response.WriteAsync(
"İstek sınırına ulaştınız. Daha sonra tekrar deneyin. ", cancellationToken: token);
                    }
                };
            });


// Add services to the container.

            builder.Services.AddControllers();
// Learn more about configuring Swagger/OpenAPI at https://aka.ms/aspnetcore/swashbuckle
            builder.Services.AddEndpointsApiExplorer();
            builder.Services.AddSwaggerGen();

var app = builder.Build();

// Configure the HTTP request pipeline.
if (app.Environment.IsDevelopment())
            {
                app.UseSwagger();
                app.UseSwaggerUI();
            }

            app.UseAuthorization();

//Tanımladığımız özellikler ile rate limit middleware aktif edilir.
            app.UseRateLimiter();

            app.MapControllers();

            app.Run();
        }
    }
}
We have added two new definitions. “QueueLimit” determines the number of requests that will wait for the specified time period to elapse after reaching the limit, while “QueueProcessingOrder” determines which request will be processed first when a new time period starts. With “OldestFirst”, we establish a structure where the first request in will be the first one to be processed.
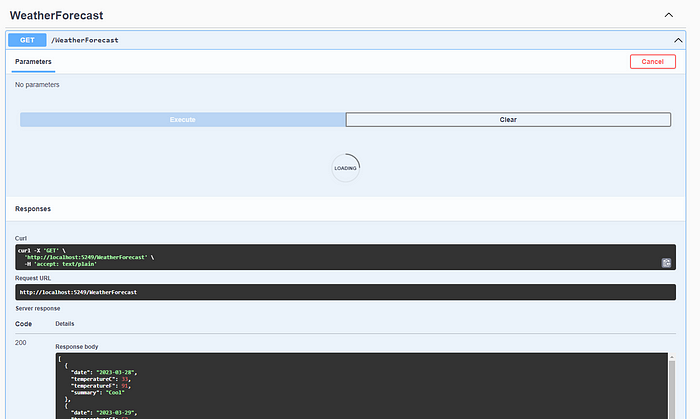
When we test the latest changes we made in our application, the requests that reach the limit will be put on hold and processed after the specified time elapses.
We can differentiate the rate limit information for the methods we use in our application. This can be achieved by writing policies and making the necessary definitions. Let’s update our Program.cs class again to add policies. By commenting out the GlobalLimiter feature, we ensure that it is not active.
//Program.cs Sınıfımız
using System.Threading.RateLimiting;

namespace BookRateLimit
{
public class Program
    {
public static void Main(string[] args)
        {
var builder = WebApplication.CreateBuilder(args);

//Rate Limit Tanımları
            builder.Services.AddRateLimiter(options =>
            {
//options.GlobalLimiter = PartitionedRateLimiter.Create<HttpContext, string>(httpcontext =>
//RateLimitPartition.GetFixedWindowLimiter(
//    partitionKey: httpcontext.Request.Headers.Host.ToString(),
//    factory: partition => new FixedWindowRateLimiterOptions
//    {
//        AutoReplenishment = true,
//        PermitLimit = 3,
//        Window = TimeSpan.FromMinutes(1),
//        //Kuyruk bilgileri
//        QueueLimit = 2,
//        QueueProcessingOrder = QueueProcessingOrder.OldestFirst
//    }
//));

//Eklenen Policy Bilgileri
                options.AddPolicy("User", httpContext =>
RateLimitPartition.GetFixedWindowLimiter(httpContext.Request.Headers.Host.ToString(),
partition => new FixedWindowRateLimiterOptions
                {
AutoReplenishment = true,
PermitLimit = 10,
Window = TimeSpan.FromMinutes(1)
                }));

                options.AddPolicy("Auth", httpContext =>
RateLimitPartition.GetFixedWindowLimiter(httpContext.Request.Headers.Host.ToString(),
partition => new FixedWindowRateLimiterOptions
                {
AutoReplenishment = true,
PermitLimit = 5,
Window = TimeSpan.FromMinutes(1)
                }));

                options.OnRejected = async (context, token) =>
                {
                    context.HttpContext.Response.StatusCode = 429;

if (context.Lease.TryGetMetadata(MetadataName.RetryAfter, out var retryAfter))
                    {
await context.HttpContext.Response.WriteAsync(
                            $"İstek sınır sayısına ulaştınız. {retryAfter.TotalMinutes} dakika sonra tekrar deneyiniz. ", cancellationToken: token);
                    }
else
                    {
await context.HttpContext.Response.WriteAsync(
"İstek sınırına ulaştınız. Daha sonra tekrar deneyin. ", cancellationToken: token);
                    }
                };
            });

// Add services to the container.

            builder.Services.AddControllers();
// Learn more about configuring Swagger/OpenAPI at https://aka.ms/aspnetcore/swashbuckle
            builder.Services.AddEndpointsApiExplorer();
            builder.Services.AddSwaggerGen();

var app = builder.Build();

// Configure the HTTP request pipeline.
if (app.Environment.IsDevelopment())
            {
                app.UseSwagger();
                app.UseSwaggerUI();
            }

            app.UseAuthorization();

//Tanımladığımız özellikler ile rate limit middleware aktif edilir.
            app.UseRateLimiter();

            app.MapControllers();

            app.Run();
        }
    }
}
Now let’s add our changes to WeatherForecastController.cs. The goal here is to make each method work with a separate policy.
//WeatherForecastController.cs
using Microsoft.AspNetCore.Mvc;
using Microsoft.AspNetCore.RateLimiting;

namespace BookRateLimit.Controllers
{
    [ApiController]
    [Route("[controller]")]
public class WeatherForecastController : ControllerBase
    {
private static readonly string[] Summaries = new[]
        {
"Freezing", "Bracing", "Chilly", "Cool", "Mild", "Warm", "Balmy", "Hot", "Sweltering", "Scorching"
    };

private readonly ILogger<WeatherForecastController> _logger;

public WeatherForecastController(ILogger<WeatherForecastController> logger)
        {
            _logger = logger;
        }

        [HttpGet(Name = "GetWeatherForecast")]
public IEnumerable<WeatherForecast> Get()
        {
return Enumerable.Range(1, 5).Select(index => new WeatherForecast
            {
                Date = DateOnly.FromDateTime(DateTime.Now.AddDays(index)),
                TemperatureC = Random.Shared.Next(-20, 55),
                Summary = Summaries[Random.Shared.Next(Summaries.Length)]
            })
            .ToArray();
        }

        [EnableRateLimiting("User")]
        [HttpGet]
        [Route("SayUserHello")]
public string SayUserHello()
        {
return "Hello User.";
        }

        [EnableRateLimiting("Auth")]
        [HttpGet]
        [Route("LoginUser")]
public string LoginUser()
        {
return "User Login Completed.";
        }
    }
}
Here, we have added the attribute [EnableRateLimiting(“”)] to the newly added methods. This allows us to activate separate policies for each method.
In some cases, we may not want a method to be subject to the globally defined rate limit. If that’s the case, we can simply add the [DisableRateLimiting] attribute to the method, indicating that it should not be included in the rate limit rules.
[DisableRateLimiting]
[HttpGet(Name = "GetWeatherForecast")]
public IEnumerable<WeatherForecast> Get()
{
return Enumerable.Range(1, 5).Select(index => new WeatherForecast
    {
      Date = DateOnly.FromDateTime(DateTime.Now.AddDays(index)),
      TemperatureC = Random.Shared.Next(-20, 55),
      Summary = Summaries[Random.Shared.Next(Summaries.Length)]
    }).ToArray();
}
Finally, if we apply the [EnableRateLimiting(“”)] and [DisableRateLimiting] attributes to the entire Controller, all methods within that Controller will be affected by this attribute assignment.
//WeatherForecastController.cs
using Microsoft.AspNetCore.Mvc;
using Microsoft.AspNetCore.RateLimiting;

namespace BookRateLimit.Controllers
{
    [EnableRateLimiting("User")]
    [ApiController]
    [Route("[controller]")]
public class WeatherForecastController : ControllerBase
    {
private static readonly string[] Summaries = new[]
        {
"Freezing", "Bracing", "Chilly", "Cool", "Mild", "Warm", "Balmy", "Hot", "Sweltering", "Scorching"
    };

private readonly ILogger<WeatherForecastController> _logger;

public WeatherForecastController(ILogger<WeatherForecastController> logger)
        {
            _logger = logger;
        }

        [HttpGet(Name = "GetWeatherForecast")]
public IEnumerable<WeatherForecast> Get()
        {
return Enumerable.Range(1, 5).Select(index => new WeatherForecast
            {
                Date = DateOnly.FromDateTime(DateTime.Now.AddDays(index)),
                TemperatureC = Random.Shared.Next(-20, 55),
                Summary = Summaries[Random.Shared.Next(Summaries.Length)]
            })
            .ToArray();
        }

        [HttpGet]
        [Route("SayUserHello")]
public string SayUserHello()
        {
return "Hello User.";
        }

        [HttpGet]
        [Route("LoginUser")]
public string LoginUser()
        {
return "User Login Completed.";
        }
    }
}
In this article, I have tried to explain the Rate Limit feature that comes with .NET 7. I hope it has been understandable for everyone.
Goodbye for now.
You can access the application code I created from the following link:
https://github.com/onurkarakus/BookRateLimit
