
Hello, in this article, we will examine the important topic of security for API applications.
It is important for the API applications we develop to be secure, both to protect the data and to prevent unauthorized individuals from using the API applications we create for their own purposes. In general, security is one of the most important issues that comes after the proper functioning of our application.
Today, we will examine the JWT Token structure, which is one of the security methods in API applications. I will try to explain the structure, creation, and working methods of the JWT Token structure in my own words.
Authentication
Authentication is the process of verifying a user’s identity. In this process, the user gains access to an application with an identity information that authenticates them. For example, a user identifies themselves to an application with a username and password. After these credentials are verified, the user’s identity is confirmed and they are granted access to resources within the system.
There are several options for implementing authentication in .NET Core Web API structure, and the most commonly used one is the JWT (JSON Web Token) based authentication structure. JWT is a data structure that stores a user’s identity information, and the validity of this data structure is ensured by a special key contained within it. Therefore, using a JWT to perform authentication is considered quite secure.
What is JSON Web Token (JWT)?
JSON Web Token (JWT) is a secure authorization method for web applications. JWT carries data in the form of tokens containing information related to user authorization, and provides secure data flow between applications using this data.
JWT consists of three parts: a header, a payload, and a signature. These parts are separated by a period “.” symbol.
Let’s take a brief look at what these sections mean.
Header:
The header information consists of two parts: the type of token and the signing algorithm. The signing algorithm can be HMAC, SHA256, or RSA.
Payload:
It represents the information to be stored or transmitted within the JWT. This can include user information, user authorization information, or additional information.
There are three types of information that can be found in the payload:
- Registered Claims: These are optional headers that contain information related to the token. Examples include sub (subject), iss (issuer), and so on.
- Public Claims: These are the headers that can be added by those using the token.
- Private Claims: These contain the information to be transmitted or shared with the token.
The information to be used in the claims should not correspond to reserved information. Therefore, specific claim naming standards have been established.
You can find the information and abbreviations used here. -> https://www.iana.org/assignments/jwt/jwt.xhtml
Signature:
To create the signature section, you need to take the Base64Url encoded header and payload information, along with a secret value, and sign them using the algorithm specified in the header.
After these steps, the resulting JWT token will look like the following.
EyJhbGciOiJIUzI1NiIsInR5cCI6IkpXVCJ9.
EyJzdWIiOiJCeU9udXIiLCJuYW1lIjoiT251ciBLQVJBS1XFniIsImlhdCI6MTUxNjIzOTAyMn0.8rPL9B1HFX-5QGX7qHOIIIsmPyUkFHbigg06sE3U-Pk
You can check the JWT token generation and decoding debugger application at https://jwt.io/#debugger-io.
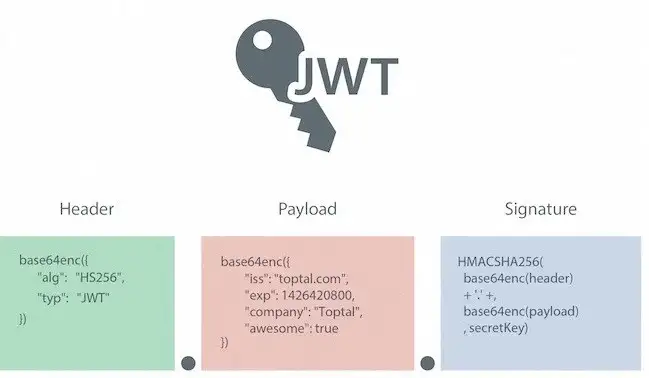
In short, JWT consists of three parts: a header, a payload, and a signature. The header defines the type and encoding format of the JWT. The payload contains authorization information and is usually stored in JSON format. The signature includes the hash value of the header and payload data and is used to verify the authenticity of the JWT.
JWT allows user authentication without the need for data storage on the server side. This eliminates the need for data storage on the server side while securely transferring data between applications, and also improves server performance.
Some of the advantages of JWT include the ease of reading and encoding data, no need for server-side data storage, and secure data transfer between applications.
What is Authentication and Authorization?
Authentication and Authorization are two fundamental concepts for the security of web applications.
Authentication is the process of verifying a user’s identity, as previously mentioned. This process requires the user to prove their identity, such as by using their username and password. Once the user’s identity is verified, the application generates a token that can be understood by the application later on for authorization purposes.
Authorization, on the other hand, is the process of determining what actions a user is allowed to perform. This process is performed after the user’s identity has been verified by the application. For example, a user can be authorized to perform only certain actions associated with a particular role. If a user attempts to perform actions outside of their authorized scope, they can be notified with a specific message. An administrator user with an “admin” role, for instance, can be authorized to perform specific actions associated with that role.
Advantages of token-based authentication
JWT authentication is a preferred authentication method in many web applications. Instead of using a password or similar information that users need to register or log in to your web application, this method performs authentication using a token that the user possesses.
Token-based authentication is generally a scalable, performant, and secure authentication method used in web applications.
- Stateless: Token can be sent and processed by the user on the application server without the need for state information to be kept on the server. Therefore, it has a fast and scalable structure.
- Trustworthy: Token information is usually encrypted and kept confidential between the user and the application. Therefore, it has a secure structure. Tokens are signed to ensure data integrity and accuracy before being processed by the application.
- Flexible: Token-based authentication can be used independently of the platform. This provides an opportunity to work comfortably with new emerging technologies and application structures.
- Performance: Applications using token-based authentication do not perform authentication for every user request received. Instead, the accuracy of the token information sent is checked. This allows our applications to run more efficiently and quickly.
- Scalable: Token-based authentication is also useful in load balancing among servers. With tokens, load balancing is facilitated, and each server can perform the same authentication and authorization process.
- Customizable: It makes it easier to give users personalized permissions and authorizations. Tokens can be given to users with specific permissions and can be customized according to the needs of the application.
- Cost-effective: Tokens can be easily created and managed with open-source libraries. Thus, it provides a cost-effective solution for authentication and authorization processes in the application.
One important point is that the authentication process alone is not an authorization mechanism. After verifying users, the levels of using our application need to be determined within the authorization structure. This will make our application more secure.
.NET Core Web API application and JWT Token
Let’s start by discussing the structure of the API application we will be creating as an example.
There will be two different controller classes in the API. The first one is the AuthContoller, where users can perform login operations, and the other one is the BookController, where users can access book information.
We will prepare two methods in the BookController, one of which will work for logged-in users and the other for all users.
As a quick example, instead of keeping records on a database, we will keep user information and response data in the application as hard-coded (In-Memory). Of course, you can also use ASP.NET Identity or another authentication system to manage users for authentication and authorization processes.
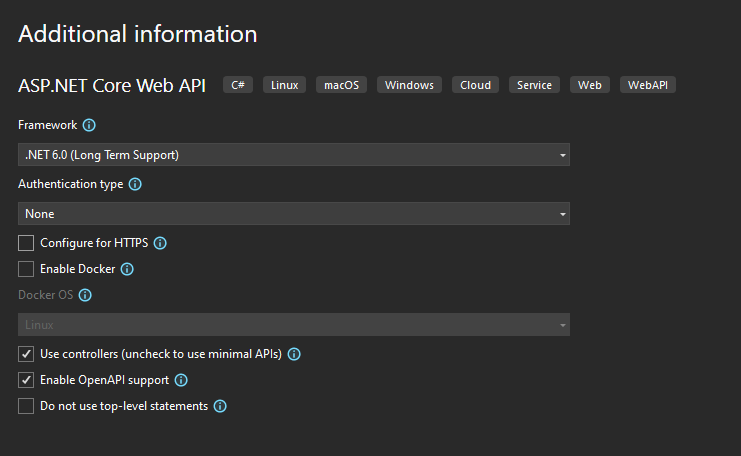
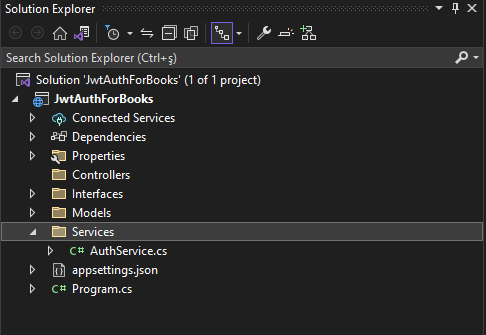
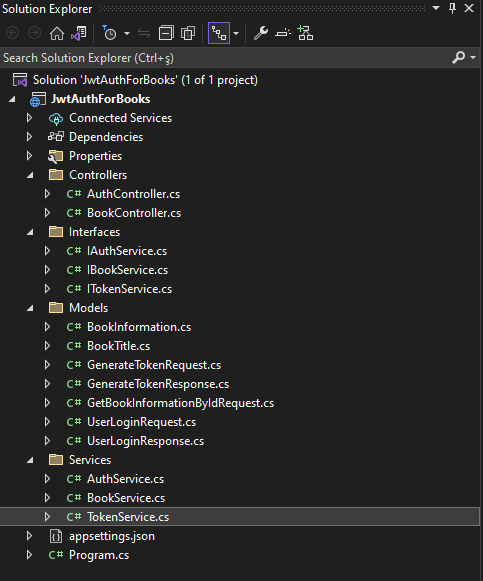
First, let’s create our project. We create an ASP.NET Core Web API project called JwtAuthForBooks.

We can delete the Controllers/WeatherForecastController.cs and WeatherForecast.cs classes that come pre-built in our application code.
Let’s first develop the Model, Controller, Interface, and Service classes for user login.
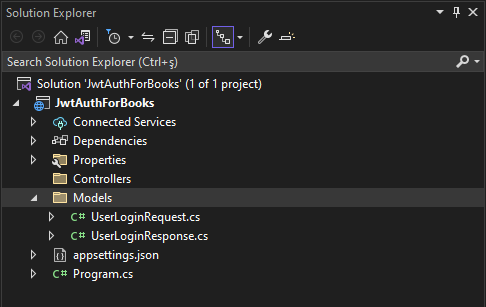
Create a folder named Models and create two classes named UserLoginRequest.cs and UserLoginResponse.cs.
//UserLoginRequest.cs

namespace JwtAuthForBooks.Models;

public class UserLoginRequest
{
public string Username { get; set; }
public string Password { get; set; }
}
//UserLoginResponse.cs

namespace JwtAuthForBooks.Models;

public class UserLoginResponse
{
public bool AuthenticateResult { get; set; }
public string AuthToken { get; set; }
public DateTime AccessTokenExpireDate { get; set; }
}
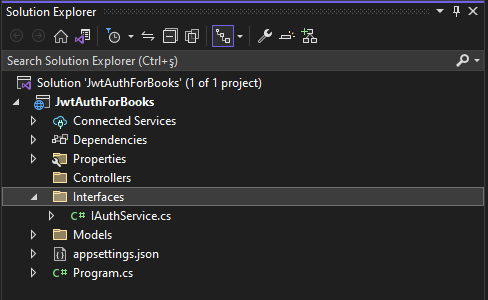
We create a class named IAuthService.cs inside a folder called Interfaces. Here, we will define our service interface to be able to inject it into our Controller class.
//IAuthService.cs
using JwtAuthForBooks.Models;

namespace JwtAuthForBooks.Interfaces;

public interface IAuthService
{
public Task<UserLoginResponse> LoginUserAsync(UserLoginRequest request);
}
We create a class named AuthService.cs in the Services folder. This class will be the service that performs our login operations.
//AuthService.cs

using JwtAuthForBooks.Interfaces;
using JwtAuthForBooks.Models;

namespace JwtAuthForBooks.Services;

public class AuthService : IAuthService
{
public Task<UserLoginResponse> LoginUserAsync(UserLoginRequest request)
    {
        UserLoginResponse response = new();

if (string.IsNullOrEmpty(request.Username) || string.IsNullOrEmpty(request.Password))
        {
throw new ArgumentNullException(nameof(request));
        }

if (request.Username == "onur" && request.Password == "123456")
        {
            response.AccessTokenExpireDate = DateTime.UtcNow;
            response.AuthenticateResult = true;
            response.AuthToken = string.Empty;
        }

return Task.FromResult(response);
    }
}
Let’s create an Api Controller named AuthController.cs in our Controllers folder and arrange it as follows. This class will be our controller for login operations.
//AuthController.cs

using JwtAuthForBooks.Interfaces;
using JwtAuthForBooks.Models;
using Microsoft.AspNetCore.Authorization;
using Microsoft.AspNetCore.Mvc;

namespace JwtAuthForBooks.Controllers;

[Route("api/[controller]")]
[ApiController]
public class AuthController : ControllerBase
{
readonly IAuthService authService;

public AuthController(IAuthService authService)
 {
this.authService = authService;
 }

    [HttpPost("LoginUser")]
    [AllowAnonymous]
public async Task<ActionResult<UserLoginResponse>> LoginUserAsync([FromBody] UserLoginRequest request)
    {
var result = await authService.LoginUserAsync(request);

return result;
    }
}

To activate our service, we register our service in the Program.cs class.
//Program.cs

using JwtAuthForBooks.Interfaces;
using JwtAuthForBooks.Services;

var builder = WebApplication.CreateBuilder(args);

// Add services to the container.

builder.Services.AddControllers();
// Learn more about configuring Swagger/OpenAPI at https://aka.ms/aspnetcore/swashbuckle
builder.Services.AddEndpointsApiExplorer();
builder.Services.AddSwaggerGen();

//The record line to be added.
builder.Services.AddTransient<IAuthService, AuthService>();

var app = builder.Build();

// Configure the HTTP request pipeline.
if (app.Environment.IsDevelopment())
{
    app.UseSwagger();
    app.UseSwaggerUI();
}

app.UseAuthorization();

app.MapControllers();

app.Run();
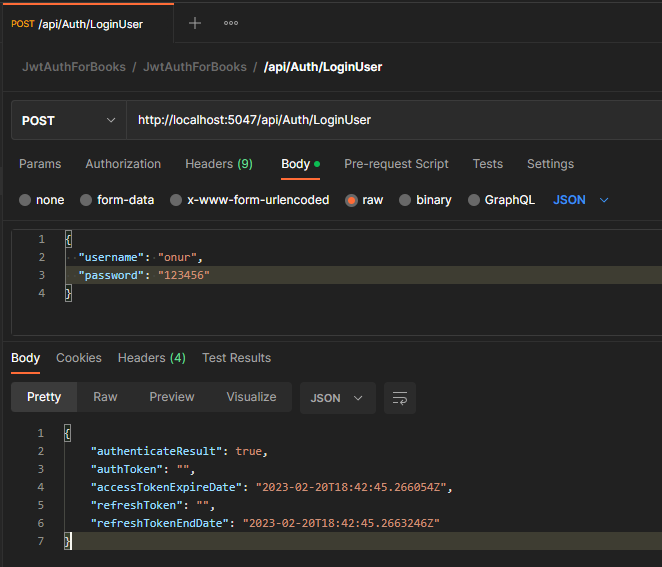
When we run our application, we can perform the login process through the controller. The token and date information will initially come as empty. We will add our improvements related to JWT token and the BookController class that we will use shortly.
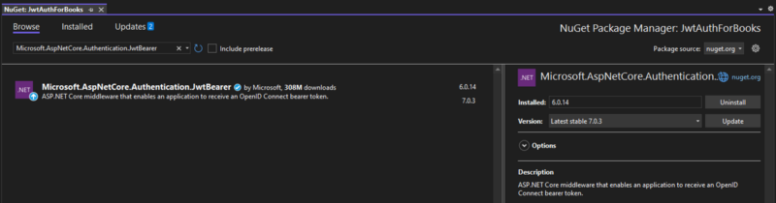
Let’s add the Nuget package that we will use for JWT operations first. You can find the package name below. Since we created our project with .NET 6, we need to get version 6.0.14. If you created your project with .NET 7, you can get version 7.
Microsoft.AspNetCore.Authentication.JwtBearer
Let’s develop the model, service interface, and service class we will use for token operations. Model information will be in the Models folder, interface information will be in the Interfaces folder, and the service class will be in the Services folder.
//GenerateTokenRequest.cs

namespace JwtAuthForBooks.Models;

public class GenerateTokenRequest
{
public string Username { get; set; }
}
//GenerateTokenResponse.cs

namespace JwtAuthForBooks.Models;

public class GenerateTokenResponse
{
public string Token { get; set; }
public DateTime TokenExpireDate { get; set; }
}
//ITokenService.cs

using JwtAuthForBooks.Models;

namespace JwtAuthForBooks.Interfaces;

public interface ITokenService
{
public Task<GenerateTokenResponse> GenerateToken(GenerateTokenRequest request);
}
//TokenService.cs

using JwtAuthForBooks.Interfaces;
using JwtAuthForBooks.Models;
using Microsoft.IdentityModel.Tokens;
using System.IdentityModel.Tokens.Jwt;
using System.Security.Claims;
using System.Text;

namespace JwtAuthForBooks.Services;

public class TokenService : ITokenService
{
readonly IConfiguration configuration;

public TokenService(IConfiguration configuration)
    {
this.configuration = configuration;
    }

public Task<GenerateTokenResponse> GenerateToken(GenerateTokenRequest request)
    {
        SymmetricSecurityKey symmetricSecurityKey = new SymmetricSecurityKey(Encoding.ASCII.GetBytes(configuration["AppSettings:Secret"]));

var dateTimeNow = DateTime.UtcNow;

        JwtSecurityToken jwt = new JwtSecurityToken(
                issuer: configuration["AppSettings:ValidIssuer"],
                audience: configuration["AppSettings:ValidAudience"],
                claims: new List<Claim> {
new Claim("userName", request.Username)
                },
                notBefore: dateTimeNow,
                expires: dateTimeNow.Add(TimeSpan.FromMinutes(500)),
                signingCredentials: new SigningCredentials(symmetricSecurityKey, SecurityAlgorithms.HmacSha256)
            );

return Task.FromResult(new GenerateTokenResponse
        {
            Token = new JwtSecurityTokenHandler().WriteToken(jwt),
            TokenExpireDate = dateTimeNow.Add(TimeSpan.FromMinutes(500))
        });
    }
}
Finally, we need to make the following changes in the appsettings.json file.
//appsettings.json

{
"Logging": {
"LogLevel": {
"Default": "Information",
"Microsoft.AspNetCore": "Warning"
}
},
"AllowedHosts": "*",

"AppSettings": {
"ValidAudience": "AudienceInformation",
"ValidIssuer": "IssuerInformation",
"Secret": "JWTAuthenticationHIGHsecuredPasswordVVVp1OH7Xzyr",
}
}
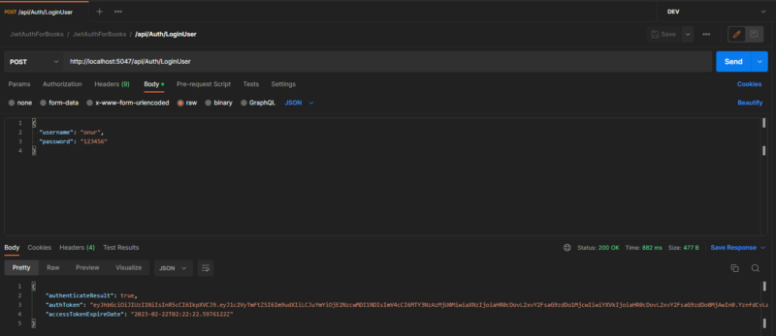
When we run our login method again, we will be able to see that the JWT Token information has been created.
Let’s take a moment to examine the service here. In the GenerateToken method of this service, we create a JWT token using the username entered by the user. The JwtSecurityToken class takes the necessary information for the JWT token and performs the token creation process. So, let’s try to examine what these information are.
One of the important points is the Secret value we pass as signingCredentials to the JwtSecuritToken class. With this value, we can sign our token information.
We do this by creating a SymmetricSecurityKey from the value we specified in our appsetting.json file. We can check this value from the token sent to us and understand that it is signed by us.
The important thing to note here is that token information is readable structures. Therefore, private information should not be included in the token.
issuer information is a value that identifies who the token value is distributed by, that is, who is identifying us. For example, a value like MyBookStore can be specified.
audience determines who will use the token value to be generated. It can be a token value generated for a site (www.test.com).
expires determines how long the token information will be active. After this period, the token will be inactive and authorization errors will be given during the use of Api methods.
notBefore can be used if you want the token information to come into effect after a certain time has passed since it was generated. Since we want the token information to be immediately active, we set the time it was generated as the starting value.
claims can be defined as the section where we add the information we want to store in the token information. Here, we can define a piece of information that is not private and later perform certain operations by taking these values when this token is sent to us.
Now let’s develop the BookController class where we will test the authorization. Then we will activate the authentication for our application and be able to do our test.
As we mentioned before in our scenario, we will have two controller methods. One of these methods will return the book list and will work for all users. Our second method will only work for authorized users who have successfully completed the login process and sent the token information, and will return the book information.
We start by creating three classes in our Models folder called BookInformation.cs, BookTitle.cs, and GetBookInformationByIdRequest.cs.
//BookInformation.cs

namespace JwtAuthForBooks.Models;

public class BookInformation
{
public int BookId { get; set; }
public string Isbn { get; set; }
public string Title { get; set; }
public string Description { get; set; }
public string AuthorName { get; set; }
}
//BookTitle.cs

namespace JwtAuthForBooks.Models;

public class BookTitle
{
public int BookId { get; set; }
public string Isbn { get; set; }
public string Title { get; set; }
}
//GetBookInformationByIdRequest.cs

namespace JwtAuthForBooks.Models;

public class GetBookInformationByIdRequest
{
public int BookId { get; set; }
}
Let’s not disrupt our service structure. We create two classes named IBookService.cs in the Interfaces folder and BookService.cs in the Services folder, and organize them as follows.
//IBookService.cs

using JwtAuthForBooks.Models;

namespace JwtAuthForBooks.Interfaces;

public interface IBookService
{
public Task<List<BookTitle>> GetBookTitlesAsync();
public Task<BookInformation> GetBookInformationByIdAsync(GetBookInformationByIdRequest request);
}
//BookService.cs

using JwtAuthForBooks.Interfaces;
using JwtAuthForBooks.Models;

namespace JwtAuthForBooks.Services;

public class BookService : IBookService
{
static readonly List<BookInformation> bookInformations = new List<BookInformation> {
new BookInformation { BookId = 1, Isbn = "9752115047", Title ="22/11/63",  AuthorName = "Stephen King",  Description = "22 Kasım 1963’te, bütün bunları değiştirme şansınız olsaydı?" },
new BookInformation { BookId = 2, Isbn = "1476762740", Title ="Uyuyan Güzeller",  AuthorName = "Stephen King *  Owen King",  Description = "Şimdi burada dünyanın kaderine karar verilecek." },
new BookInformation { BookId = 3, Isbn = "9752126049", Title ="Enstitü",  AuthorName = "Stephen King",  Description = "Enstitü..." }
        };

public Task<BookInformation> GetBookInformationByIdAsync(GetBookInformationByIdRequest request)
    {
var loadedBookInformation = bookInformations.FirstOrDefault(p => p.BookId == request.BookId);

return Task.FromResult(loadedBookInformation);
    }

public Task<List<BookTitle>> GetBookTitlesAsync()
    {
var booktitleList = bookInformations.Select(book => GenerateBookTitleForList(book)).ToList();

return Task.FromResult(booktitleList);
    }

private static BookTitle GenerateBookTitleForList(BookInformation book)
    {
return new BookTitle { BookId = book.BookId, Title = book.Title, Isbn = book.Isbn };
    }
}
Now we add our BookController.cs class to the Controllers folder.
Here, it is important to note that we use the [AllowAnonymous] attribute for the method that all users can access without authorization, and the [Authorize] attribute for the method that can only be accessed by authorized users. As the names suggest, we have defined our methods that will work anonymously and with authorization in this way.
Now let’s register our service in our Program.cs class.
//Program.cs

using JwtAuthForBooks.Interfaces;
using JwtAuthForBooks.Services;

var builder = WebApplication.CreateBuilder(args);

// Add services to the container.

builder.Services.AddControllers();
// Learn more about configuring Swagger/OpenAPI at https://aka.ms/aspnetcore/swashbuckle
builder.Services.AddEndpointsApiExplorer();
builder.Services.AddSwaggerGen();

builder.Services.AddTransient<IAuthService, AuthService>();
builder.Services.AddTransient<ITokenService, TokenService>();

// The record line to be added.
builder.Services.AddTransient<IBookService, BookService>();

var app = builder.Build();

// Configure the HTTP request pipeline.
if (app.Environment.IsDevelopment())
{
    app.UseSwagger();
    app.UseSwaggerUI();
}

app.UseAuthorization();

app.MapControllers();

app.Run();
Now that we have made all the necessary developments, let’s activate the authorization structure for our application. To do this, let’s make our definitions within the Program.cs class again.
//Program.cs

using JwtAuthForBooks.Interfaces;
using JwtAuthForBooks.Services;
using Microsoft.AspNetCore.Authentication.JwtBearer;
using Microsoft.IdentityModel.Tokens;
using System.Text;

var builder = WebApplication.CreateBuilder(args);

// Add services to the container.

builder.Services.AddControllers();
// Learn more about configuring Swagger/OpenAPI at https://aka.ms/aspnetcore/swashbuckle
builder.Services.AddEndpointsApiExplorer();
builder.Services.AddSwaggerGen();

builder.Services.AddTransient<IAuthService, AuthService>();
builder.Services.AddTransient<ITokenService, TokenService>();
builder.Services.AddTransient<IBookService, BookService>();

// lines to be added
builder.Services.AddAuthentication(options =>
{
    options.DefaultAuthenticateScheme = JwtBearerDefaults.AuthenticationScheme;
    options.DefaultChallengeScheme = JwtBearerDefaults.AuthenticationScheme;
    options.DefaultScheme = JwtBearerDefaults.AuthenticationScheme;
}).AddJwtBearer(o =>
{
    o.TokenValidationParameters = new TokenValidationParameters
    {
        ValidIssuer = builder.Configuration["AppSettings:ValidIssuer"],
        ValidAudience = builder.Configuration["AppSettings:ValidAudience"],
        IssuerSigningKey = new SymmetricSecurityKey(Encoding.UTF8.GetBytes(builder.Configuration["AppSettings:Secret"])),
        ValidateIssuer = true,
        ValidateAudience = true,
        ValidateLifetime = false,
        ValidateIssuerSigningKey = true
    };
});

builder.Services.AddAuthorization();

//End of the lines to be added

var app = builder.Build();

// Configure the HTTP request pipeline.
if (app.Environment.IsDevelopment())
{
    app.UseSwagger();
    app.UseSwaggerUI();
}

// lines to be added

app.UseAuthentication();
app.UseAuthorization();

//End of the lines to be added

app.MapControllers();

app.Run();
The final state of our project will be as follows.
We defined the functionality of JWT token structure to work with AddAuthentication() method. With AddAuthorization(), we indicated that there will be authorization. We activated these definitions with UseAuthentication() and UseAuthorization().
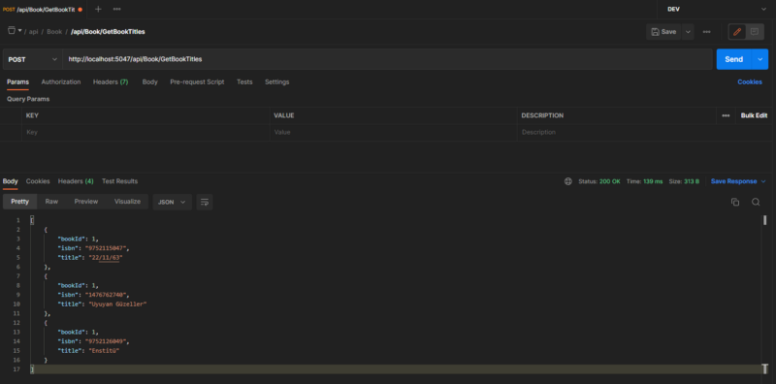
Now, we can test our methods. Our method defined with [AllowAnonymous] will work without any issues during the test.
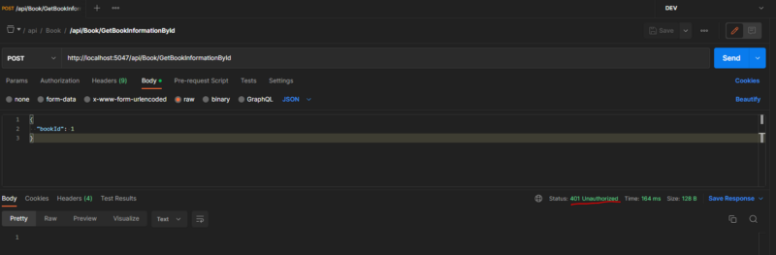
Users who have not successfully passed the login process and have not received the token information will receive a 401 Unauthorized error when they run the GetBookInformationById method.
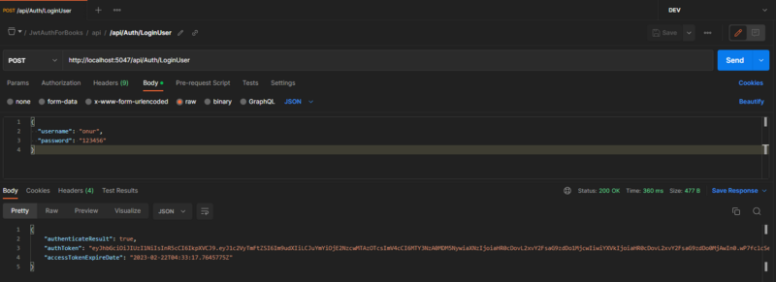
Let’s log in with the username and password through the Login method to obtain the token information. Then, we will retry the GetBookInformationById method by sending this token information.
We have successfully logged in and obtained the token information.
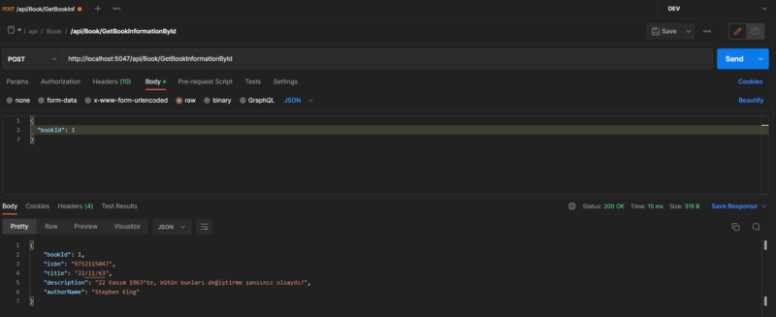
Now, we will try the process again by sending this token information to the GetBookInformationById method. However, when sending the token, we will include it in the header information with the key value of Authorization. It should be sent in the format of Bearer <token_info>.

After that, when we run our method again with the token we received, we can see that the method returns a response with authorization since we have successfully authenticated.
In this article, I have tried to explain the JWT Token topic as much as possible. I hope it becomes a useful source of information for you.
You can access the application codes we created from the link below.
https://github.com/onurkarakus/JwtAuthForBooks
See you later.
